These three should now be listed in the Models Box, and should be displayed in the small preview box (which you can rotate using the sliders) when you click on them in the list.
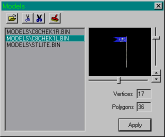
21 Place the start-line object. Select "Edit Objects" from the toolbar.
Right-click near where the start of course segment "0" is (infront of where the truck positions are) and select "Insert" from the popup-menu. You should see a purple box - if it doesn't say "BOX", click on it. In the Models Box, select "STLITE.BIN" and click the Apply button. The purple box should now change to show the starting-line model.
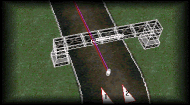
You can move the model around simply by clicking near its middle and dragging it with the mouse. You may need to go to View/Options and select "Always show course" so you can see where the course is while placing the model.
22 Place the checkpoint flags. Use the arrow keys to move to the opposite side of the course (around the beginning of course segment 2). Right-click at the side of the track and select "Insert" just like we did before. In the Models Box, select "C8CHEK1R.BIN" and click Apply. Repeat with "C8CHEK1L.BIN" on the other side of the track. Again, you can move these around with the mouse so that they are located correctly.
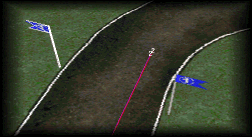
23 Configure the objects. The start-line structure and flag objects need to be made non-collideable, otherwise the game prevents you from driving through them (this applies to the flag parts, even though they dont touch the ground). Double-click on each of the flags and start-line object (or right-click, then select Properties from the popup menu). In the Properties box, set the "Type" for each object to "no-collide" and click OK.
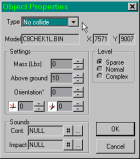
In order to prevent driving through the flag poles and the bases of the start-line object, some additional objects must now be added. Right-click in a clear part of the terrain and select "Insert" to make a purple box like we did before. But this time we wont apply an object to it (these purple boxes with no model are invisible in the game, but cannot be driven through). Double-click the purple box (Properties), change the "Size" values to 3 x 3 x 20 and click OK. Move the object so that is in the same location as one of the checkpoint flag poles.
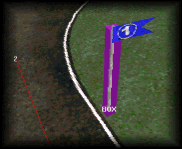
Repeat for the other flag pole. Repeat two more times for the bases of the start-line object, but this time setting the size to 16 x 16 x 20. A good way to check you have the boxes centered properly is to use PgDn as far as it will go to point directly downward - then look at the objects from above.
24 Checkpoint behavior. So far, we have only made the appearance of checkpoints - additional objects need to be added to make them function correctly in the game. In the ModelsBox, click the Load Model button and load up "Ckboxn.bin" (not "Ckbox.bin"). Insert a new object at a clear part of the terrain (like before) and apply object "CKBOXN.BIN" to it. Double-click it and set its "Type" to "Checkpoint" in Properties. Notice that when you do that, the Properties box displays sequence number 0. Click OK, then drag the object so that it front face is lined up with the front of the start-line object.
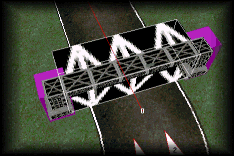
Repeat this to add a CKBOXN object inbetween the flags for the other checkpoint. When you set its type to "Checkpoint", leave the sequence number at 0 - Traxx will automatically change the one at the finish line to sequence 1 (the one at the finish line must be the last in the sequence - ie highest sequence number).
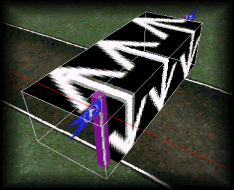
Finally, go to properties again for this checkpoint and change the "Orientation" angle to 180. The arrows on the top of the CKBOXN object must be pointing the same way that the course goes!
Make sure the front edge of the object is lined-up to be just infront of the flags.
25 Save your work!
26 Test the track. Woohoo - now we can write the POD file, mount it and test the track! Click the "Write POD" button on the toolbar (or File/WritePODFile, or Ctrl+W). For now, ignore the warnings in the "Incomplete Track" box - just click OK.
Browse to locate your POD folder (if necessary) - this might be your MTM folder, if thats where you keep your add-ons. Enter a name for the POD file (eg "MyFirstTrack"), and click "Save". You sould see a progress box for a few seconds saying "Writing POD File...".
Use your favorite pod mounter (PODX, podini etc) to mount the track, then race that puppy. Make sure the map looks correct (tab), the computer trucks follow the course correctly, the checkpoints register correctly, etc...
Because we didnt set a backdrop yet, the horizon may look funny - dont worry about that.
Prev Lesson Next Lesson
Back to Traxx School
Back to Traxx Home Page
All Software referenced by this site is Copyright by SoftParts and cannot be sold or distributed in any way other than by SoftParts.
SoftParts accepts no responsibility for any loss, damage or injury incurred as a result of the use of this software (not that thats going to happen, mind you....)