Lesson G - Ground-boxes.
These are solid block objects which are used for bridges and tunnels etc. We will build a wall.
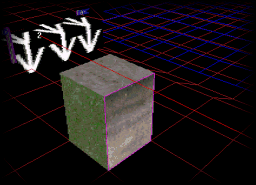
38 Add a groundbox. Select "Edit Ground boxes" from the toolbar.

As you move the cursor over the terrain you now see a red outline. Ground-boxes are
in fixed locations, aligned to the terrain grid squares. Right-click a square on a
flat portion or terrain alongside part of the track and select "Insert" from the
popup menu.
A cuboid will appear, altoyugh it may be difficult to see depending on which texture
you had selected. To make it easier to see, click the "Wireframe" button on the right
until you see the black background with red grid.
Click on any side of the new ground-box and it should outline in purple. In the
side-panel, you will see numbers for "Bottom" and "Top" - spin the "Bottom" value
up to 100 (so that it lines-up with the terrain which should also stillbe at 100).
You can also use the S/X keys to raise and lower ground-boxes, just like in terrain
editing.
39 Paint the groundbox. Textures can be applied to ground-boxes just as they can be
applied to the terrain. In the TexturesBox, click the [Load >>] button and enter
"C8BR" in the filter box. After you click "Refresh" you should see 4 textures
listed - just double-click on the first one (C8BR100) to load it. Now set the
filter to "MARK" and click "Refresh". Double-click on MARKMTLX to load that. Close
the [Load >>] section.
Select the MARKMTLX texture (will be last in the display since we loaded it last).
Click on the "Paint Mode" (or "Paint Face" in full registered version), then click
the top face of the ground-box to paint it.
Now select the other texture we just loaded (C8BR100) and apply that in the same way
to the sides of the groundbox (you will need to move around it to do this, of course).

Move your view downward to go below the terrain (Z key) and use PgUp so that you face
upwards and can see the bottom of the groundbox. Click to paint that. This may seem
pointless, because you'll never see the bottom, but it is necessary for the underside
of bridges etc....
40 Build a wall. We dont really need the wireframe view now, so click the "Wireframe"
button again to get back to normal. The wall will be made by adding copies of the
groundbox we just created.
Right click on any face of the groundbox and select "Copy Box" from the popup menu.
Move the cursor so the square next to the groundbox is outlined, then right-click and
select "Paste Box" from the popup menu. Paste again as many times as you want to
build a wall.
Prev Lesson
Back to Traxx School
Back to Traxx Home Page
The small print
All Software referenced by this site is Copyright by SoftParts and cannot be sold or distributed in any
way other than by SoftParts.
SoftParts accepts no responsibility for any loss, damage or injury incurred as a result of the use of this
software (not that thats going to happen, mind you....)
